Free Google Calendar Booking System: Step-by-Step Guide to Appointment Scheduling

Your Automation Guy
Learn how to set up a free online booking system with Google Calendar. This guide will help you use Google appointment scheduling to let clients easily book meetings online and manage your appointments efficiently.
Table of Contents
- Step 1: Open Google Calendar
- Step 2: Set Up Appointment Slots
- Step 3: Limit Booking Windows
- Step 4: Block Unavailable Times
- Step 5: Add Buffers Between Appointments
- Step 6: Customize Booking Details
- Step 7: Hide Appointments from Calendar
- Step 8: Share Your Booking System
- Step 9: Test Your Booking Page
- Bonus Tips
Step 1: Open Google Calendar
Go to Google Calendar or open it from any Google app like Gmail. Click Create and select Appointment schedule.

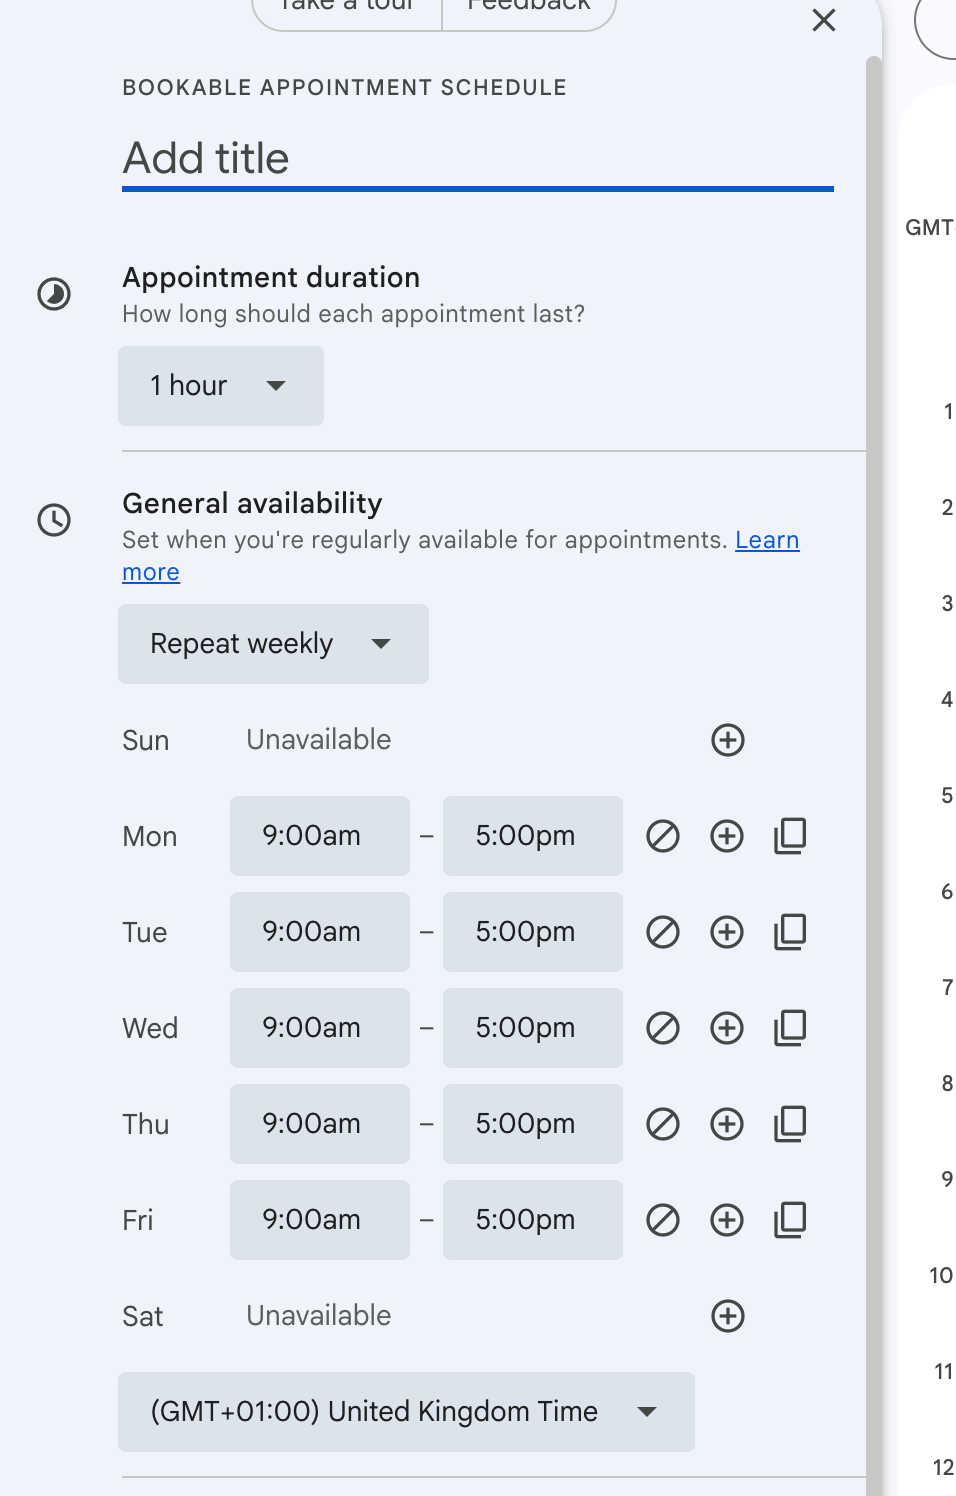
Step 2: Set Up Appointment Slots
- Title: Give your booking a clear name, e.g., "Strategy Meeting".
- Duration: Set how long each appointment will be, e.g., 1 hour.
- Availability: Choose the days and times you’re available. Add breaks or lunch hours. You can repeat weekly.
- Time Zone: Make sure your calendar is set to your local time zone.
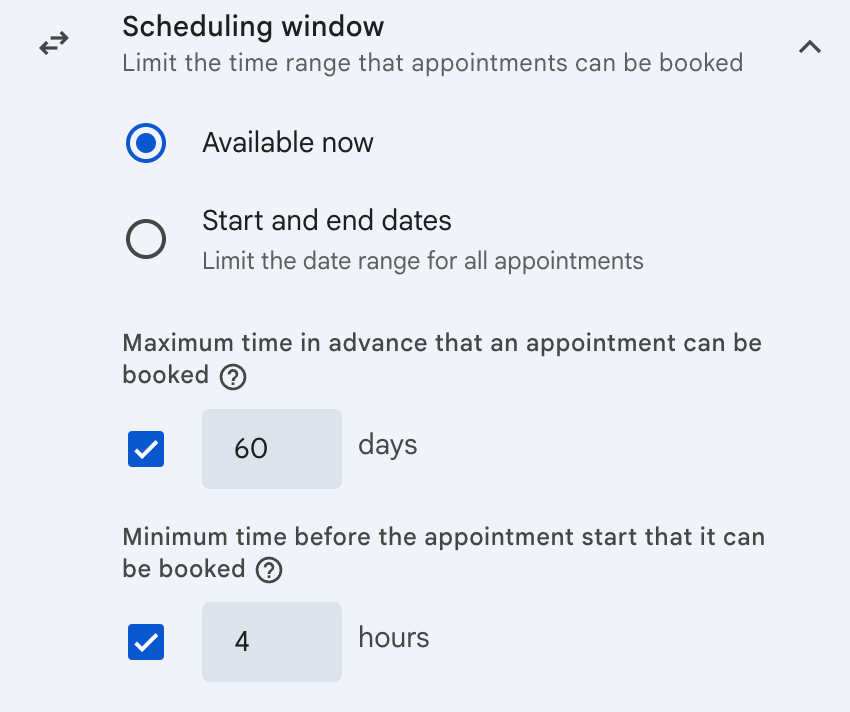
Step 3: Limit Booking Windows
- Maximum Advance Booking: Limit how far in advance someone can book (30 days is usually good).
- Minimum Notice: Set a minimum time before appointments (e.g., 6 hours) so you aren’t booked last-minute.
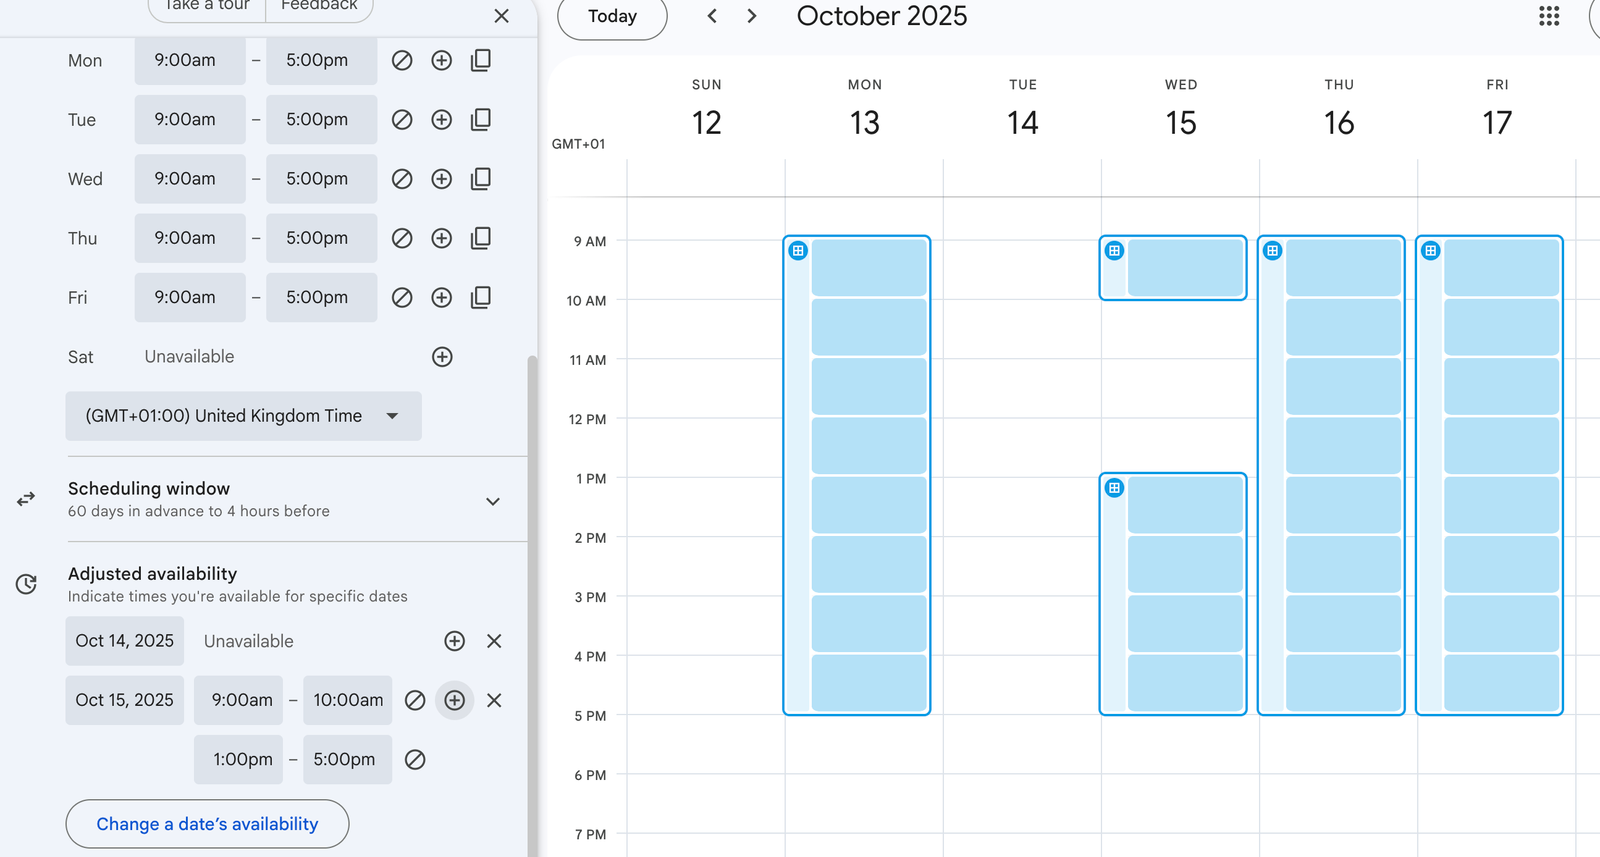
Step 4: Block Unavailable Times
Mark holidays or personal days as Unavailable. You can also block specific times so no one can book during them.
Step 5: Add Buffers Between Appointments
Use a buffer (e.g., 15 minutes) between appointments to avoid back-to-back meetings and give yourself time to prepare.

Step 6: Customize Booking Details
- Add a description for your booking page.
- Set the meeting location. Google Meet is free and reliable.
- Customize the booking form to collect name, email, and extra details like "Why do you want to meet?"

Note: Features like automated reminders and payments are premium, but the free system works well for basic bookings.
Step 7: Hide Appointments from Calendar
If you want a tidy calendar, you can hide appointment slots until they’re booked.

Step 8: Share Your Booking System
- Link: Copy the booking link to share on social media or email.
- Embed on Website: You can add a button for a pop-up booking form or embed the full calendar inline.
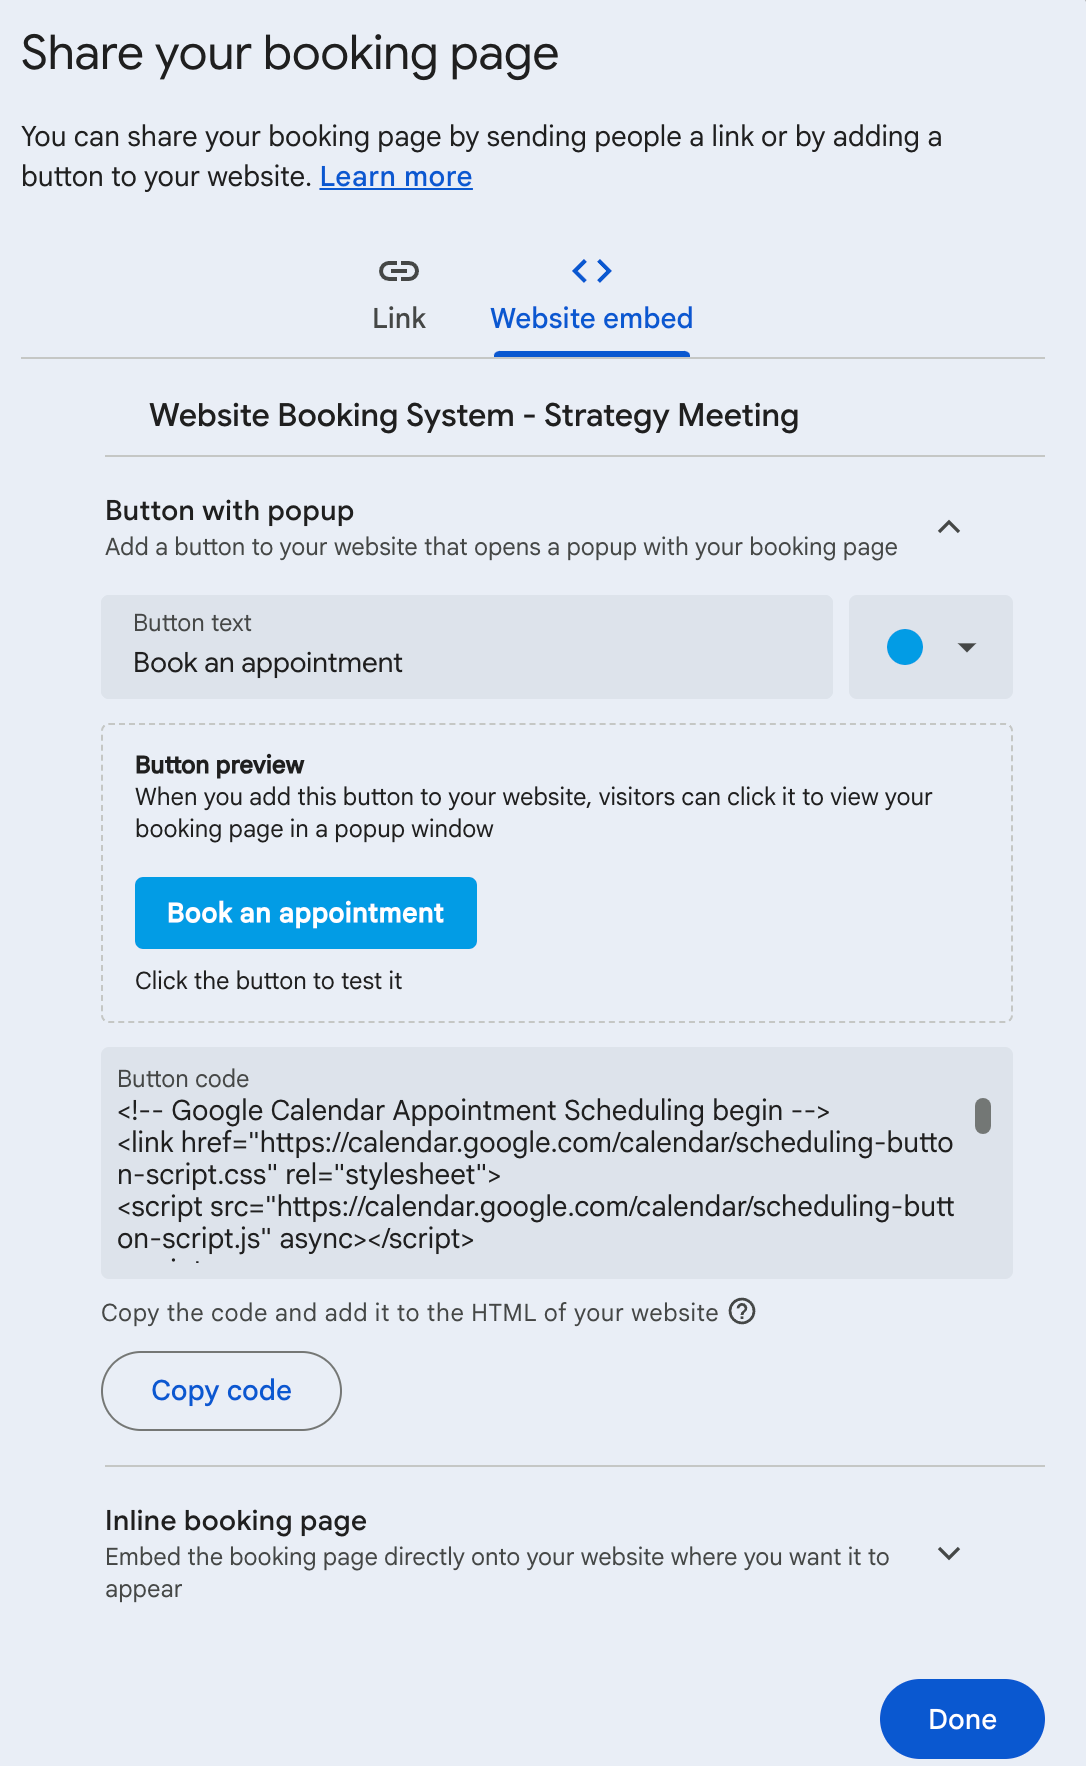
Clients can book without logging in. Once booked, both you and your client get email confirmations.
Step 9: Test Your Booking Page
Open your booking page in incognito mode to test the user experience. Make sure blocked times and buffers are applied correctly.
Bonus Tips
- Always mark personal events as Busy so they block slots automatically.
- Use clear titles and descriptions for better client understanding.
- Check your availability regularly if your schedule changes.
With this setup, you now have a free online booking system using Google Calendar. Clients can easily schedule appointments, and you can manage your time efficiently.
If you want a more robust or fully integrated solution, our website booking systems services provide professional setups with advanced features, seamless integration, and expert support to take your business bookings to the next level.